Remote Access
Copyright © Quectel Wireless Solutions Co., Ltd. 2026. All rights reserved.
RDP (Remote Desktop Protocol) is a graphical remote desktop connection method. A Windows host can use the built-in Remote Desktop Connection tool to access the Debian desktop of a Quectel Pi development board (M1/L1), and view or control the graphical interface remotely.
Quectel Pi M1 mainly uses the GNOME desktop environment and already integrates GNOME Remote Desktop, so VNC, Xvfb, x11vnc, or similar software does not need to be installed separately. Quectel Pi L1 currently uses the Weston graphical environment and can provide a remote desktop service through Weston’s built-in RDP backend.
Note
When using RDP remote desktop on M1, keep the graphical desktop session logged in. For L1 RDP, Weston rdp-backend.so is recommended.
Preparation
Confirm the device environment:
Quectel Pi M1 / L1 has booted into the Debian system.
The Windows host and development board are reachable on the same network segment or the same LAN.
The Remote Desktop Connection tool is installed or enabled on the Windows host.
It is recommended to access the development board through the serial port. For detailed serial port connection instructions, refer to debug_uart.md. For M1, use the account and password created during setup as prompted. For L1, log in as the
rootuser by default, with no password. If the local debugging environment is already available, you can also enter the system through ADB (L1).Obtain the device IP address. Run the following command on the development board:
hostname -I
Record the IP address on the current network. This address is required when connecting from Windows Remote Desktop later.
💡 Note: The Windows host and development board must be on the same network segment or same LAN, and the network must be reachable in both directions. Otherwise, even if the RDP service has started on the board, the connection cannot be established normally.
If you plan to start the RDP service with the normal user q (L1), create the user and set the password first:
adduser --disabled-password --gecos "" q
echo 'q:q' | chpasswd
If a usable normal user already exists in the system, reuse the existing user and do not create it again.
M1: GNOME Remote Desktop
Software Installation
The GNOME desktop environment in the Quectel Pi M1 Debian system already integrates remote desktop-related functions. In general, VNC, Xvfb, x11vnc, or similar software does not need to be installed separately.
Run the following command in a terminal to check whether the remote desktop management tool exists:
which grdctl
If the command returns /bin/grdctl, the system already includes the GNOME Remote Desktop management tool.
Software Configuration
Enter the remote desktop settings page. In the Quectel Pi M1 graphical interface, go to: Settings > System > Remote Desktop.
Enable remote desktop. In the remote desktop settings page, enable the following switches as needed:
Desktop Sharing: Allows other devices to view the current desktop through the RDP protocol.
Remote Control: Allows the remote endpoint to control the mouse and keyboard.
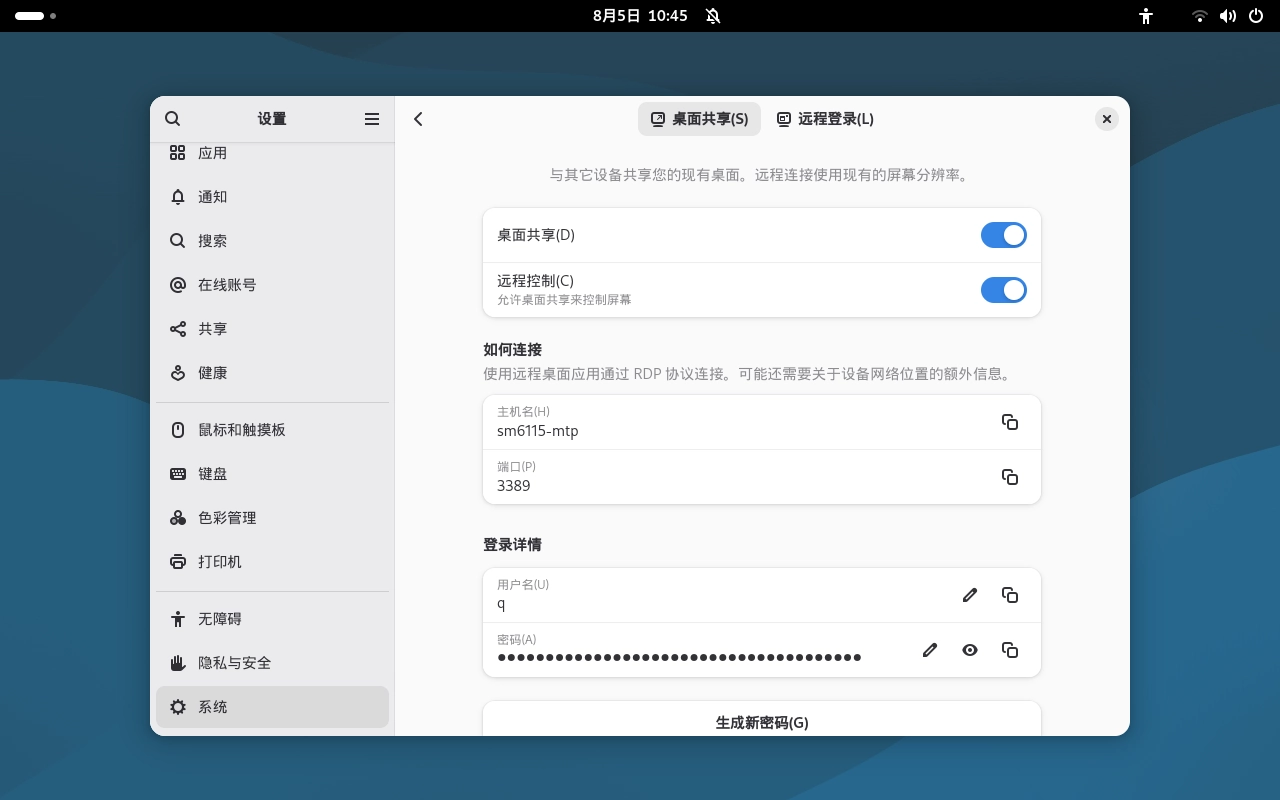
View connection information. In the remote desktop settings page, view the host name for identifying the device on the LAN, port, default RDP port
3389, username, and password. To change the login password, click the edit button next to the password field and reset it as prompted by the UI.
Keep the Remote Desktop Login Password
If the login password is modified only on the Remote Desktop page in system settings, it may need to be set again after the device reboots or the user logs in again. To keep the remote desktop login password available, modify the Login keyring password through the Passwords and Keys tool.
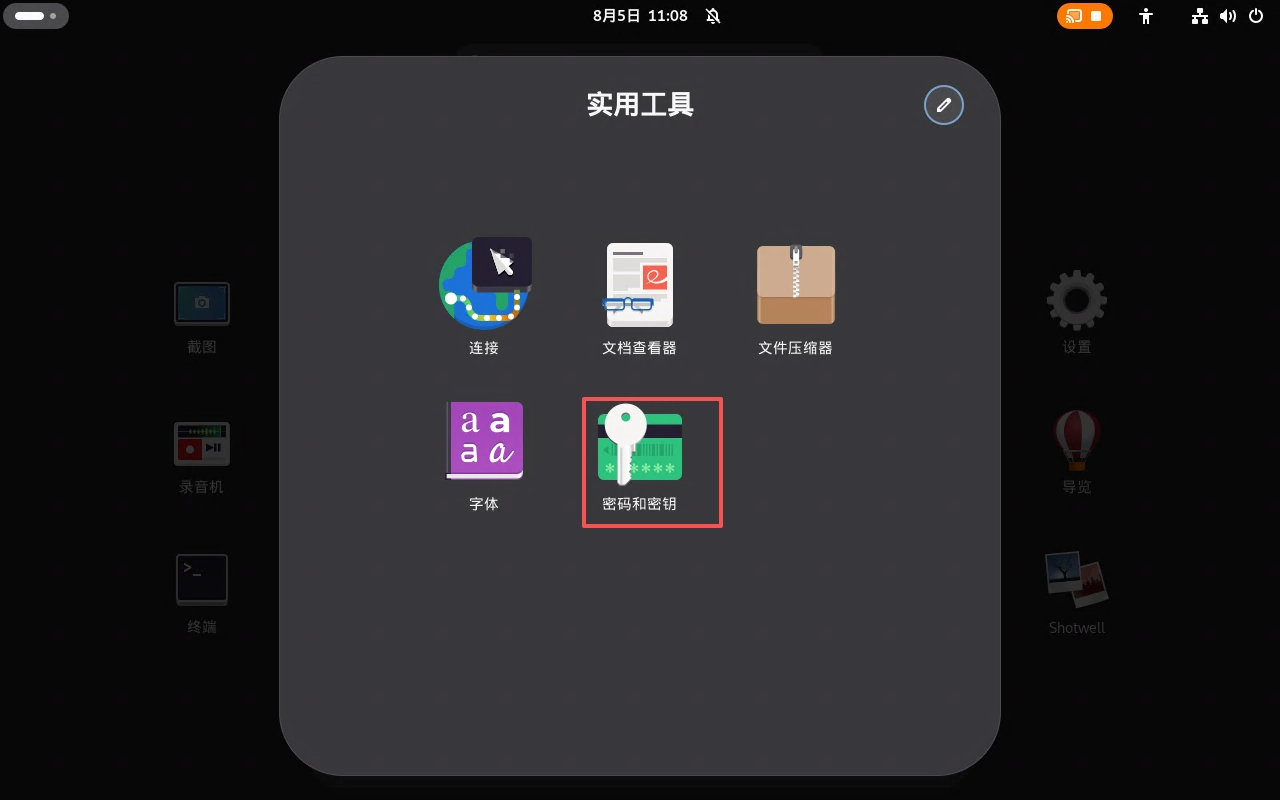
Open Utilities in the application list, and click Passwords and Keys.
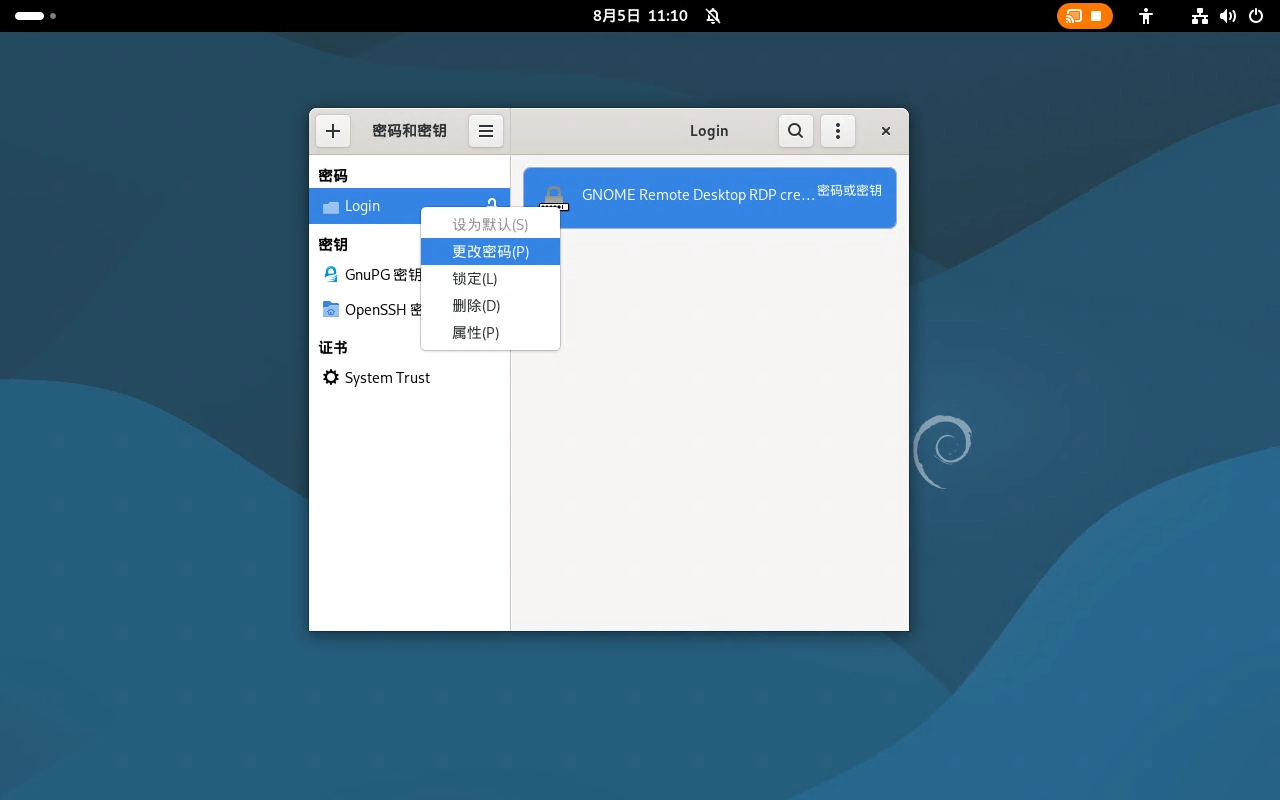
In the Passwords category, select
Login, right-click the remote desktop credential, and select Change Password.
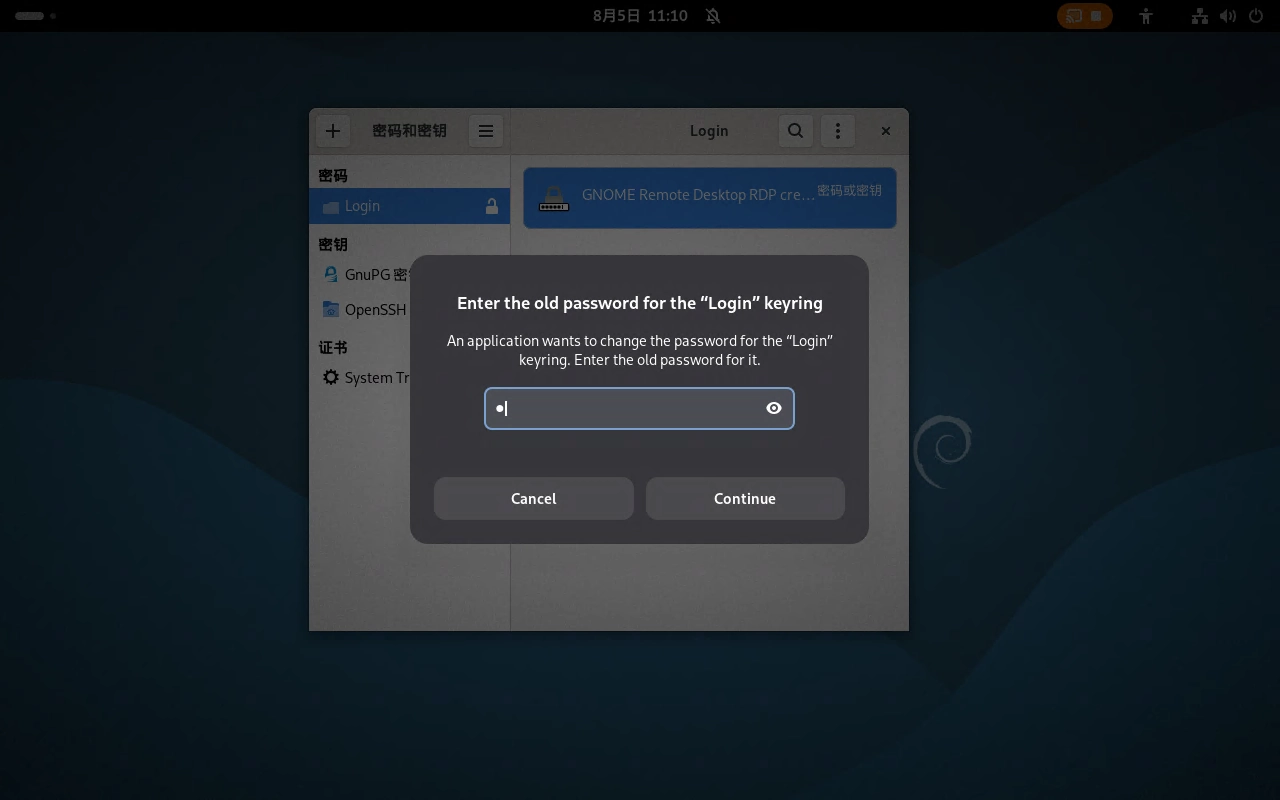
Enter the old password. The old password is the remote login password configured earlier in the remote desktop settings, for example
qin this test environment.
Set the new
Loginkeyring password. If you want the system to automatically read remote desktop credentials after login, leave the new password empty and click Continue.If the new password is left empty, the system prompts that the password will be stored unencrypted. Confirm and click Continue.
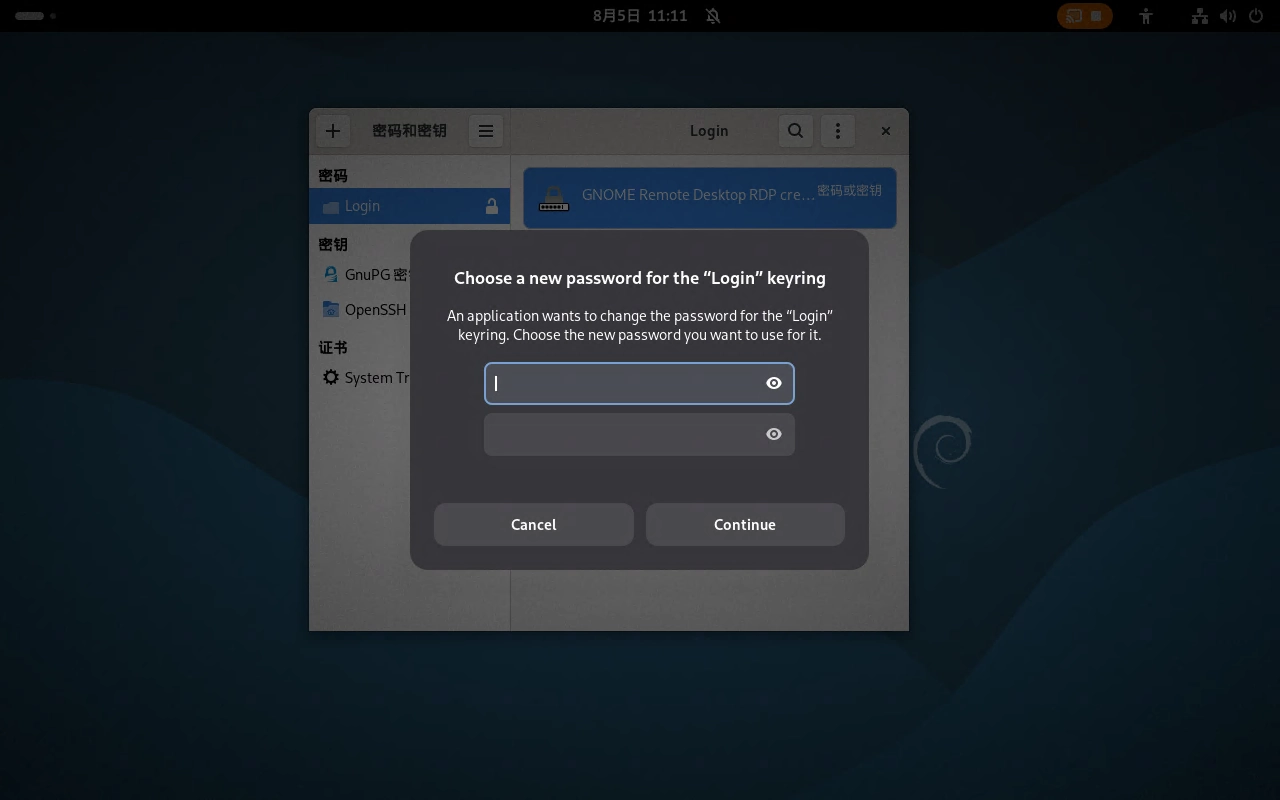
Note
Setting the Login keyring password to empty reduces credential security and is recommended only in development and debugging environments. If the device is used in production or shared by multiple users, use a non-empty password and manually unlock the keyring when needed.
Software Startup
After Desktop Sharing is enabled in the graphical interface, the GNOME Remote Desktop service is automatically enabled.
You can also use the following command in the terminal to view the current status:
grdctl status --show-credentials
Normally, RDP-related status, port, username, and remote control mode can be viewed.
To enable the RDP backend from the command line, run:
grdctl rdp enable
To allow the remote endpoint to control the mouse and keyboard, run:
grdctl rdp disable-view-only
To allow the remote endpoint to view the desktop only and not control the mouse or keyboard, run:
grdctl rdp enable-view-only
Note
In actual use, it is recommended to complete configuration through the graphical interface first to avoid inconsistency between command-line configuration and the UI display state.
L1: Weston RDP Backend
Software Installation
Check whether Weston supports the RDP backend:
env LD_LIBRARY_PATH=/opt/qcom/lib:/lib weston --help | grep -i rdp
find /usr/lib* -name 'rdp-backend.so' 2>/dev/null
If rdp-backend.so is found, the current system includes the Weston RDP backend.
Note
The weston in the current Quectel Pi L1 image depends on runtime libraries under /opt/qcom/lib. If running weston directly reports libweston-10.so.0: cannot open shared object file, add LD_LIBRARY_PATH=/opt/qcom/lib:/lib before the command.
Software Configuration
Configure RDP Certificates
Weston RDP backend requires a TLS certificate and private key. Select the certificate location according to the startup user.
If the RDP service is started as root, generate certificates under /etc/weston:
mkdir -p /etc/weston
openssl req -x509 -newkey rsa:2048 -nodes \
  -keyout /etc/weston/rdp.key \
  -out /etc/weston/rdp.crt \
  -days 365 \
  -subj "/CN=quectel-pi-l1"
chmod 600 /etc/weston/rdp.key
chmod 644 /etc/weston/rdp.crt
If the RDP service is started as normal user q, generate certificates under /home/q:
mkdir -p /home/q
openssl req -x509 -newkey rsa:2048 -nodes \
  -keyout /home/q/weston-rdp.key \
  -out /home/q/weston-rdp.crt \
  -days 365 \
  -subj "/CN=quectel-pi-l1"
chown q:q /home/q/weston-rdp.key /home/q/weston-rdp.crt
chmod 600 /home/q/weston-rdp.key
chmod 644 /home/q/weston-rdp.crt
If a usable certificate already exists in the system, reuse the existing certificate path.
Software Startup
Temporarily Start the RDP Service
Weston RDP backend can also be temporarily started as root or normal user q to provide an independent RDP desktop:
Start as
root: suitable for quick verification in the initial L1 environment after logging in as root through the serial port.Start as
q: suitable for daily use after a normal user has been created.
This method creates a new Weston RDP desktop and does not mirror the local MIPI/HDMI physical screen. If you need to remotely share the current physical screen, use the screen-share method in the previous section first.
Only start one Weston RDP instance at a time. Do not run multiple startup commands at the same time, otherwise they will compete for port 3389.
Start as root
Foreground startup:
env LD_LIBRARY_PATH=/opt/qcom/lib:/lib weston --backend=rdp-backend.so \
  --socket=wayland-rdp-root \
  --idle-time=0 \
  --rdp-tls-cert=/etc/weston/rdp.crt \
  --rdp-tls-key=/etc/weston/rdp.key \
  --width=1280 \
  --height=800
Background startup:
nohup env LD_LIBRARY_PATH=/opt/qcom/lib:/lib weston --backend=rdp-backend.so \
  --socket=wayland-rdp-root \
  --idle-time=0 \
  --rdp-tls-cert=/etc/weston/rdp.crt \
  --rdp-tls-key=/etc/weston/rdp.key \
  --width=1280 \
  --height=800 \
  >/tmp/weston-rdp.log 2>&1 &
Start as a normal user
Prepare the runtime directory before startup. If you have already logged in as user q, skip the chown command. If the current user is root, run the complete commands below:
mkdir -p /run/user/1007
chown q:q /run/user/1007
chmod 700 /run/user/1007
Run the following commands as user q. If the current prompt already starts with q@..., run them directly and do not add runuser -u q --.
runuser -u q -- is used only when the current login user is root, to temporarily switch from a root shell to user q for the following command. If you are already logged in as user q, adding runuser -u q -- may fail because the environment does not contain that command.
Foreground startup:
env -i \
  HOME=/home/q \
  USER=q \
  LOGNAME=q \
  SHELL=/bin/bash \
  PATH=/usr/local/sbin:/usr/local/bin:/usr/sbin:/usr/bin:/sbin:/bin \
  XDG_RUNTIME_DIR=/run/user/1007 \
  LD_LIBRARY_PATH=/opt/qcom/lib:/lib \
  weston --backend=rdp-backend.so \
  --socket=wayland-rdp \
  --idle-time=0 \
  --rdp-tls-cert=/home/q/weston-rdp.crt \
  --rdp-tls-key=/home/q/weston-rdp.key \
  --width=1280 \
  --height=800
Background startup:
nohup env -i \
  HOME=/home/q \
  USER=q \
  LOGNAME=q \
  SHELL=/bin/bash \
  PATH=/usr/local/sbin:/usr/local/bin:/usr/sbin:/usr/bin:/sbin:/bin \
  XDG_RUNTIME_DIR=/run/user/1007 \
  LD_LIBRARY_PATH=/opt/qcom/lib:/lib \
  weston --backend=rdp-backend.so \
  --socket=wayland-rdp \
  --idle-time=0 \
  --rdp-tls-cert=/home/q/weston-rdp.crt \
  --rdp-tls-key=/home/q/weston-rdp.key \
  --width=1280 \
  --height=800 \
  >/tmp/weston-rdp.log 2>&1 &
If the current user is root, you can also add runuser -u q -- before env -i in the startup command above to start the RDP service as user q. Example:
runuser -u q -- env -i \
  HOME=/home/q \
  USER=q \
  LOGNAME=q \
  SHELL=/bin/bash \
  PATH=/usr/local/sbin:/usr/local/bin:/usr/sbin:/usr/bin:/sbin:/bin \
  XDG_RUNTIME_DIR=/run/user/1007 \
  LD_LIBRARY_PATH=/opt/qcom/lib:/lib \
  weston --backend=rdp-backend.so \
  --socket=wayland-rdp \
  --idle-time=0 \
  --rdp-tls-cert=/home/q/weston-rdp.crt \
  --rdp-tls-key=/home/q/weston-rdp.key \
  --width=1280 \
  --height=800
Check RDP port listening:
netstat -ltnp | grep 3389
If output similar to the following is shown, the RDP service has started:
tcp 0 0 0.0.0.0:3389 0.0.0.0:* LISTEN <PID>/weston
Stop the RDP Service
To stop a temporarily started Weston RDP service, run:
pkill -f 'weston.*rdp-backend'
Remote Desktop Connection
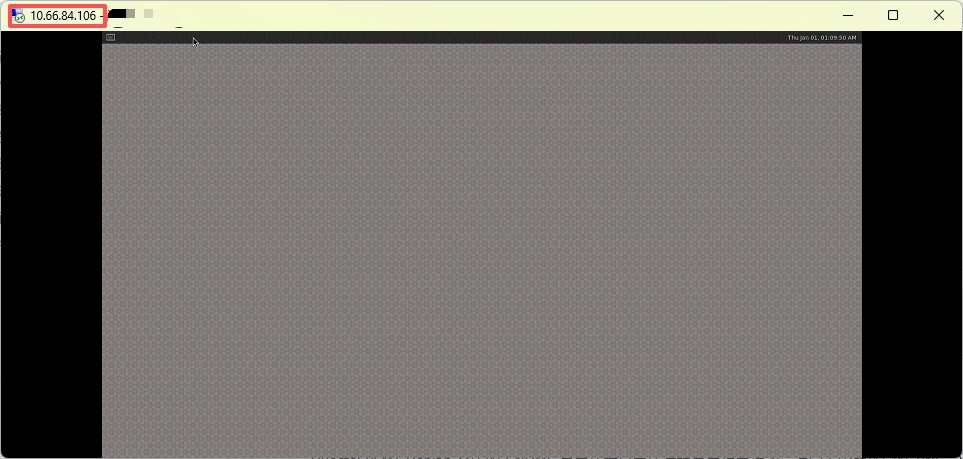
Open Remote Desktop Connection on the Windows host.
Enter the development board IP address in the Computer input field, for example
10.66.84.106. To manually specify a port, enter10.66.84.106:3389.
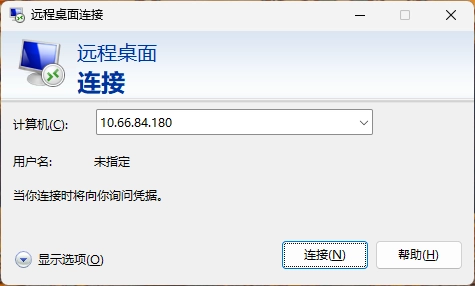
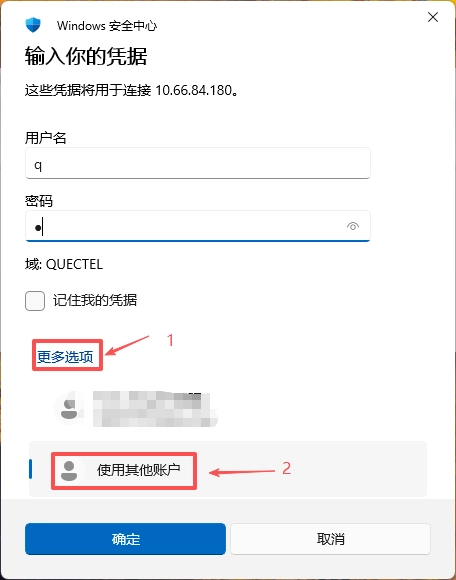
Click Connect, and enter the username and password shown in the remote desktop settings page as prompted. If Windows Security asks for credentials, click More choices, select Use a different account, and enter the username and password configured in the remote desktop settings page.
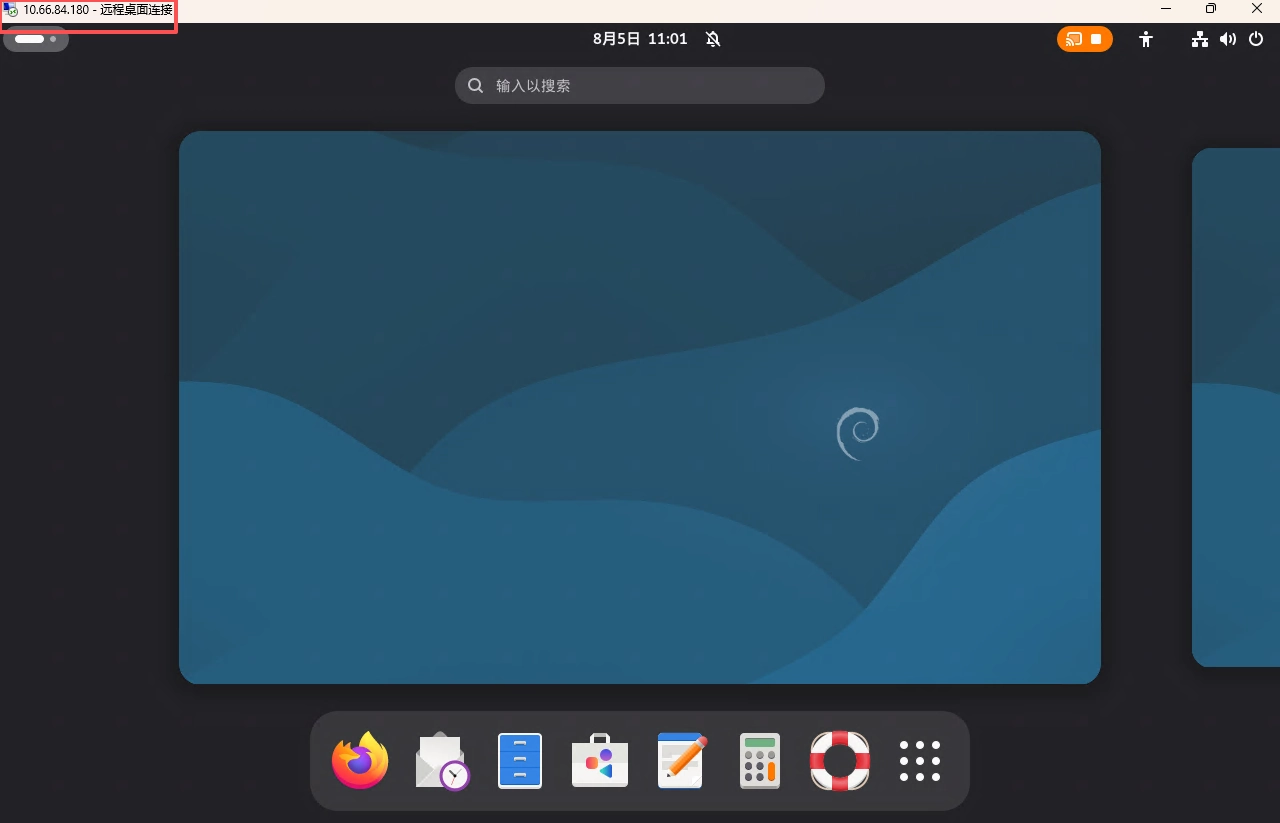
After the connection succeeds, you can view and operate the Debian desktop from the Windows host. After L1 is connected successfully, you can remotely view and operate the Weston RDP desktop.
Troubleshooting
Symptom |
Possible Cause |
Solution |
|---|---|---|
No output from |
Weston was not compiled with or does not include the RDP backend |
Check whether |
|
The dynamic library path required by Weston is not set |
Add |
Startup reports a certificate or private key error (L1) |
Certificate path is incorrect, the file does not exist, or the private key permissions are incorrect |
Confirm that |
No output from |
Weston RDP backend did not start successfully |
Check error messages in |
Windows Remote Desktop cannot connect (L1) |
No reachable IP, port 3389 is not listening, or the network is unreachable |
Run |
A certificate is reported as untrusted during connection (L1) |
A local self-signed certificate is used |
Confirm that the IP is correct and continue, or replace it with a trusted certificate |
Windows Remote Desktop cannot connect (M1) |
The Windows host and M1 are not on the same LAN |
Confirm both network connections and obtain the M1 IP address again |
Windows Remote Desktop cannot connect (M1) |
IP address or port is incorrect |
Run |
Windows Remote Desktop cannot connect (M1) |
Desktop Sharing is not enabled |
Go to |
Desktop can only be viewed and the mouse/keyboard cannot be controlled (M1) |
Remote Control is not enabled, or the current mode is view-only |
Enable Remote Control, or run |
Login reports incorrect username or password (M1) |
The entered credentials do not match those shown in the remote desktop settings |
Use the username and password shown in the remote desktop settings page. Regenerate or manually modify the password if needed |
Remote desktop password becomes invalid after reboot or re-login (M1) |
The |
Modify the |
Display is abnormal or does not refresh after connection (M1) |
The graphical desktop session state is abnormal |
Confirm that M1 has logged in to the graphical desktop, disconnect, and reconnect |
Cannot connect after network switching (L1/M1) |
The device IP address changed |
Run |